How to build an AI: steps to preparing your CUDO Compute VM
Setting up your CUDO Compute Virtual Machine (VM) is a crucial step in getting your AI project off the ground. This section will guide you through deploying a VM on CUDO Compute and installing the necessary software and frameworks to ensure your environment is fully equipped for your AI workload.
Deploying a VM on CUDO Compute involves a few key steps, tailored specifically to CUDO’s platform. CUDO Compute offers a flexible and cost-effective cloud computing environment suitable for AI, machine learning, and data-intensive workloads.
Step-by-step guide to deploy a VM on CUDO Compute:
- Log in to CUDO Compute:
- Start by logging into your CUDO Compute account. If you don’t have an account, create one by signing up on the CUDO Compute platform.
- Create a new VM:
- Navigate to the “Compute” section on the dashboard.
- Click on “Create VM” to start configuring your virtual machine.
- Choose a template:
- CUDO Compute provides a range of VM templates based on different operating systems and configurations. Choose an appropriate template, such as Ubuntu, CentOS, or Windows Server, depending on your project requirements.
- Configure VM specifications:
- CPU and memory: Select the desired CPU and memory allocation based on your workload needs. For AI tasks, choose higher CPU cores and memory for optimal performance.
- Storage: Configure the storage size for your VM. Ensure sufficient disk space to accommodate your datasets, model files, and software installations.
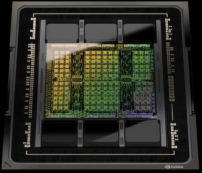
- GPU (if needed): For AI and deep learning projects, choose a VM with GPU acceleration. CUDO Compute offers GPUs like NVIDIA H100, which are ideal for training neural networks.
- Networking and security:
- Set up networking options, including public IP addresses, if required.
- Configure security settings such as firewalls and access controls to secure your VM.
- Deploy the VM:
- Review your configuration settings and click “Deploy”. The VM will be created and initialized based on your specified configuration.
- Access your VM:
- Once deployed, access your VM via SSH using the credentials provided during setup.
Install required software and frameworks
After deploying your VM, the next step is to set up the software and frameworks necessary for your AI project. The instructions below are general and applicable to any VM, providing a robust environment for developing and deploying AI models.
Step-by-step guide to install required software and frameworks:
- Update your system:
Before installing new software, update your package list to ensure all existing packages are up to date.
sudo apt update && sudo apt upgrade -y
- Install essential tools:
Install basic tools like Git, Curl, and Build Essentials, which are often required for software installations and compiling code.
sudo apt install -y git curl build-essential
- Install python and package managers:
Python is the most widely used language for AI and machine learning projects. Install Python along with pip, a package manager for Python.
sudo apt install -y python3 python3-pip
- Install AI and machine learning frameworks:
Install popular frameworks like TensorFlow, PyTorch, Scikit-learn, and other libraries commonly used for data science.
pip3 install tensorflow torch scikit-learn pandas numpy matplotlib transformers
- Set up GPU drivers (if needed):
If your VM needs a GPU, ensure that the appropriate GPU drivers and CUDA toolkit are installed. This is crucial for using the full computational power of your GPU.
*# Install NVIDIA drivers*

sudo apt install -y nvidia-driver-470

*# Install CUDA toolkit*

sudo apt install -y nvidia-cuda-toolkit
Note: This step is not needed on CUDO Compute as our VMs come with NVIDIA driver and CUDA toolkit preinstalled.
- Install jupyter notebook or jupyterlab:
Jupyter notebook is an excellent tool for developing and testing AI models interactively. Install Jupyter and start a server to access it from your local machine.
pip3 install jupyterlab
Launch Jupyter Lab:
jupyter lab --ip=0.0.0.0 --port=8888 --no-browser --allow-root
If you prefer to use Jupyter notebook on your CUDO Compute VM, click here to see our setup guide. When using the notebook script in the link, make sure to remove the -rm flag so your image is not removed after you exit. The startup script should be:
docker run --gpus all --env=GEN\_CERT=yes -d -p 8888:8888 -v "${PWD}":/home/jovyan/work jupyter/scipy-notebook:latest start-notebook.sh --NotebookApp.token=my-password
- Install database clients (if needed):
Depending on your project requirements, you may need to connect to a database. Install clients for MySQL, PostgreSQL, or other databases as needed.
sudo apt install -y mysql-client postgresql-client
- Version control setup:
Set up Git for version control, which is essential for managing your project’s codebase. Configure your Git credentials:
git config --global user.name "Your Name"

git config --global user.email "your.email@example.com"
- Additional tools and IDEs:
You might also want to install code editors and IDEs such as VS Code or PyCharm. These can be accessed via remote desktop protocols or used locally with synced project files.
Final check:
Ensure all installations are working correctly by running test commands. For instance, check Python version (
These steps will fully prepare your VM with the software and frameworks to support your AI development workflow and ensure you have all the tools required to build, test, and deploy your AI models efficiently.
Learn more: LinkedIn , Twitter , YouTube , Get in touch .
High-performance cloud GPUs