Stable Diffusion with NVIDIA A40: a step-by-step guide
Stable Diffusion is an AI model that transforms simple text prompts into stunning, high-resolution images, which opens up creative possibilities for artists, designers, and enthusiasts alike. However, like all generative AI models we have discussed, Stable Diffusion requires substantial computational resources.
CUDO Compute offers access to NVIDIA A40 GPUs, which are designed to accelerate AI workloads. By combining Stable Diffusion with the high-performance capabilities of the A40, you can generate intricate artwork, experiment with styles, and bring your artistic visions to life in less time than using just a CPU.
Whether you're a seasoned AI artist or a curious beginner, this guide will walk you through setting up and using Stable Diffusion on CUDO Compute. We'll cover everything from getting your model to starting your first image generation project.
If you need to learn how to create a Virtual machine and SSH into it, read our guide on How to use PyTorch on CUDO Compute. All the steps are explained in detail.
Step 1: Select your model
The first step is selecting your model. In this guide, we will use the stable diffusion model of stability AI. The model and its documentation are on hugging face.
 Source: Stability AI
When getting a model from hugging face, you first have to create an account. When that is done, you have to generate an access token, which you will use to pull your model into your VM. To do that, Click on your profile picture and navigate to ‘Settings.’

Click on ‘Access Tokens,’ then ‘Create New Token’.

Select all the necessary permissions for this token, the repositories you want it to access, the organizations you wish it to access, and so on. When that is done, click on ‘Create Token’. Copy the token and save it in a secure place.
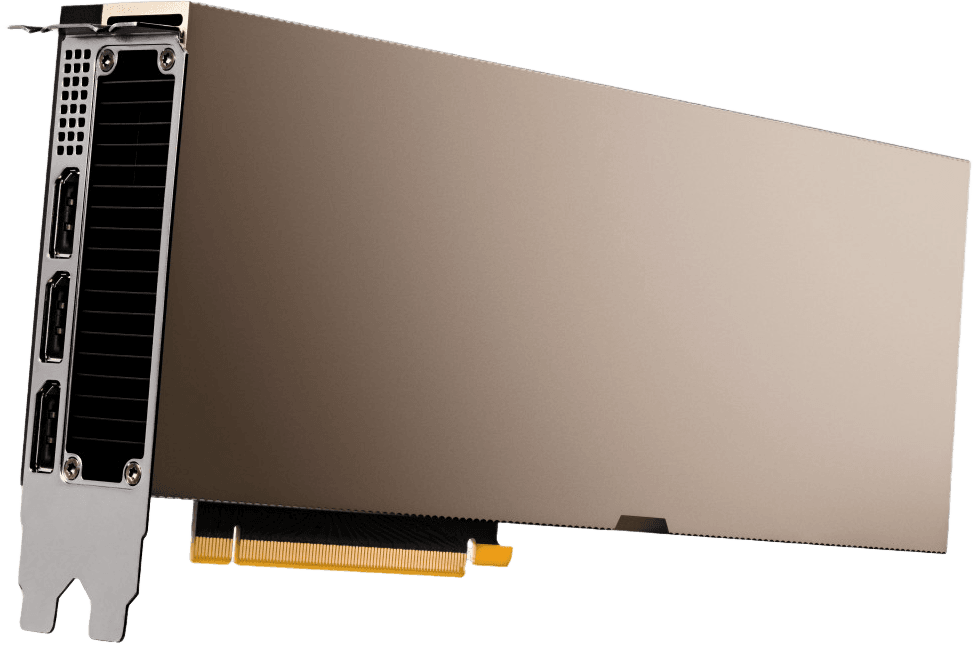
Next, create your project on CUDO Compute and create a VM. We will be using an NVIDIA A40 along with 2 vCPUs, 8GB memory, and 150GB Boot disk. To configure yours, you can follow the steps here.

SSH into your VM, then run the update and upgrade command.
sudo apt update && sudo apt upgrade -y

Then install pip, which we will use when installing other Python libraries and frameworks with this command:
apt install python3-pip

Next, we will install a virtual environment on the machine. Even though you are working in a VM, it is best to do this for the following reasons:
- Isolation: Virtual environments isolate the Python dependencies for your project, which prevents conflicts between different projects that might require different versions of the same library. Installing a library for one project without a virtual environment could break another project that relies on a different version.
- Reproducibility: Virtual environments ensure your project has the exact dependencies it needs to run correctly, making it easier to share your project with others or deploy it to production, as you can be confident that the environment will be the same.
- Cleanliness: Virtual environments keep the system-wide Python installation clean. You won't clutter your VM's global libraries with project-specific dependencies, making it easier to manage Python on the VM overall.
Even though you're working in a cloud VM, which provides some isolation, virtual environments provide a more fine-grained control over dependencies specific to your project.
We will use venv in this guide, but you can use a different tool to manage your virtual environment, like conda. As we are using an Ubuntu system, we have to install the python3-venv package using the following command.
apt install python3.10-venv

Now, we will create a folder for the project and navigate into it.
mkdir stable_diffusion && cd stable_diffusion
We will create our virtual environment within this folder using venv, which we installed earlier.
python3 -m venv venv

You should have a venv folder in this directory, as in the image above. Next, activate the virtual environment using this command.
source venv/bin/activate

With our virtual environment activated, we can install the libraries and dependencies needed.
pip install torch torchvision torchaudio diffusers huggingface_hub matplotlib accelerate transformers sentencepiece protobuf
This will take a moment to run. You will be ready to use Stable Diffusion on CUDO Compute when it is done.

Next, we will create a script to test the model on the VM.
First, we will create a folder to save the images we want to generate with this model.
mkdir generated_images
Then, we’ll get down to writing the code.
Import all modules you need.
import os
import torch
from diffusers import DiffusionPipeline
from huggingface_hub import HfFolder, login
from PIL import Image
Next, we must authenticate our Hugging Face ID to pull the model.
# Set your Hugging Face token
token = "your_hugging_face_token"
os.environ["HF_AUTH_TOKEN"] = token
HfFolder.save_token(token)
# Login with your token
login(token=token)
The token will be the Hugging Face token you created earlier.
WARNING: Leaving your Hugging Face token (or any secret key) in your codebase is a security risk. Someone who accesses your code could steal the token and use it to generate images at your expense or even gain access to your Hugging Face account.
Always securely store tokens, passwords, and other secrets using environment variables to prevent this. This keeps them separate from your code and makes it harder for them to be accidentally exposed.
Next, we load the model using a Diffusion Pipeline.
# Load the model using DiffusionPipeline
pipe = DiffusionPipeline.from_pretrained("stabilityai/stable-diffusion-3-medium-diffusers", torch_dtype=torch.float16)
pipe = pipe.to("cuda")
These lines of codes perform two key actions related to loading and configuring the diffusion model for image generation:
- Loading the Model:
- DiffusionPipeline.from_pretrained("stabilityai/stable-diffusion-3-medium-diffusers"): This line uses the from_pretrained method of the DiffusionPipeline class from the diffusers library. It downloads the pre-trained diffusion model from the Hugging Face Hub. The specific model being loaded here is "stabilityai/stable-diffusion-3-medium-diffusers", which is a medium-sized version of the Stable Diffusion 3 model.
- Moving the Model to GPU:
- pipe.to("cuda"): This line moves the loaded model pipeline (pipe) to the CUDA-enabled device, which is the Graphics Processing Unit (GPU) if available, and in our case, it is. As discussed previously, Diffusion models are computationally expensive, and GPUs can significantly accelerate the image generation process compared to running on a CPU.
Next, we use the loaded diffusion model (pipe) to generate an image based on the provided text prompt and other parameters.
# Generate an image
result = pipe(
"A smiling cat holding a sign that says hello world",
negative_prompt="",
num_inference_steps=28,
guidance_scale=7.0,
)
Let's break down each element:
- result = pipe(...): This line calls the pipe object, which represents the loaded diffusion pipeline. It asks the model to generate an image based on the arguments provided within the parentheses.
- "A cat holding a sign that says hello world": This text prompt describes the desired image. The model will use this information to guide the image generation process.
- negative_prompt="": This is an optional argument for specifying a negative prompt. A negative prompt allows you to tell the model what you do not want in the image. Here, we use an empty string, indicating no specific negative prompt.
- num_inference_steps=28: This argument controls the number of inference steps used during image generation. Each step refines the image based on the model's understanding of the prompt. Higher values generally lead to higher quality images, but also take longer to generate.
- guidance_scale=7.0: This argument controls the influence of the text prompt on the generated image. A higher value increases the model's adherence to the prompt, while a lower value allows for more creative freedom.
After executing this code, the result variable will contain information about the generated image, including the actual image data itself. Next, we retrieve the generated image and save it to a specific location.
# Get the generated image
image = result.images[0]
# Save the image
image_path = "generated_images/generated_image.png"
image.save(image_path)
Here's a breakdown:
- Retrieving the Image:
- result.images0: As explained earlier, the result variable holds information about the generated image. Here, we access the images attribute within result. This attribute likely contains a list of generated images (potentially for variations or multiple generation runs). We use 0 to access the first image from the list (assuming there's only one generated image).
- Saving the Image:
- image_path = "generated_images/generated_image.png": This line defines the path where the image will be saved. It saves the image with the filename "generated_image.png".
- image.save(image_path): This line uses the save method of the image object (which we retrieved from the result.images0). The method takes the image_path as an argument, specifying the destination for saving the image.
To run the code, use the python3 command. Assuming the file is saved as app.py, use the following command.
python3 app.py
If you run the code for the first time, it will download the model from Hugging Face and generate the image.

The image will be saved in your generated_images folder. To view it, you can simply use Secure Copy (SCP) to copy the image to your local machine. To do this, navigate to the command line on your local computer and run this command.
scp root@external_ip:~/stable_diffusion/generated_images/generated_image.png the/destination/path
Note: Replace External_IP with the actual IP address of your virtual machine. If you have set up a named host for your VM, like we did here, you can use this command instead:
scp sdserver:~/stable_diffusion/generated_images/generated_image.png the/destination/path

The image will be copied into your computer.

When using the A40 GPU on CUDO Compute for Stable Diffusion tasks, the execution speed is noticeably different from that of a local machine.
import os
import torch
from diffusers import DiffusionPipeline
from huggingface_hub import HfFolder, login
from PIL import Image
import time # Import the time module
# Set your Hugging Face token
token = "your_hugging_face_model"
os.environ["HF_AUTH_TOKEN"] = token
HfFolder.save_token(token)
# Login with your token
login(token=token)
# Start time measurement
start_time = time.time()
# Load the model using DiffusionPipeline
pipe = DiffusionPipeline.from_pretrained("stabilityai/stable-diffusion-3-medium-diffusers", torch_dtype=torch.float16)
pipe = pipe.to("cuda")
# Generate an image
result = pipe(
"A cat holding a sign that says hello world",
negative_prompt="",
num_inference_steps=28,
guidance_scale=7.0,
)
# Get the generated image
image = result.images[0]
# Save the image
image_path = "generated_images/generated_image.png"
image.save(image_path)
# End time measurement
end_time = time.time()
# Calculate and display execution time
execution_time = end_time - start_time
print(f"Script execution time: {execution_time:.2f} seconds")
This script's average execution time on CUDO Compute on the first run when the model is downloaded is around 67 seconds.


On subsequent runs, when the model is already cached, the execution time drops to an average of around 41 seconds. The same script could take hours to run on a single desktop computer. You can access the NVIDIA A40 GPU from as low as $0.79 per hour on CUDO Compute. Begin now!
Summary
In this guide, you've successfully learned how to use the NVIDIA A40 GPUs on CUDO Compute and the Stable Diffusion model to generate images from text prompts. You've learned how to:
- Set up a virtual machine on CUDO Compute with a GPU.
- Create and manage a Python virtual environment to keep your project organized.
- Install the necessary libraries and tools for working with Stable Diffusion.
- Authenticate with Hugging Face to download the model.
- Write a Python script to generate images from text prompts.
- Transfer the generated images to your local machine for viewing and sharing.
You can now experiment with different prompts and parameters, and even explore other AI models on CUDO Compute's infrastructure. Whether you're an artist, designer, or AI enthusiast, the ability to generate images from text is a powerful tool that can enhance your workflow and spark new ideas.
Next Steps (Beyond the Guide):
- Explore Advanced Prompts: Learn how to craft more complex prompts for greater control over image generation.
- Fine-tune the Model: If you have specific images or styles in mind, you can fine-tune the Stable Diffusion model to suit your needs better.
- Build Applications: Integrate Stable Diffusion into web or desktop applications for interactive image generation.
Check out our docs and resources, try different architectures, and tackle challenging deep-learning tasks.
Continue reading
AI hardware installation & maintenance: from GPU racks to memory and storage
16 min read
Key considerations for optimizing power efficiency with sustainable energy sources
21 min read
Building for 70% AI-driven demand: Planning for the coming capacity surge
18 min read
NVIDIA H100 versus H200: how do they compare?
12 min read